
IKEA HACK- KALLAX TOY STORAGE

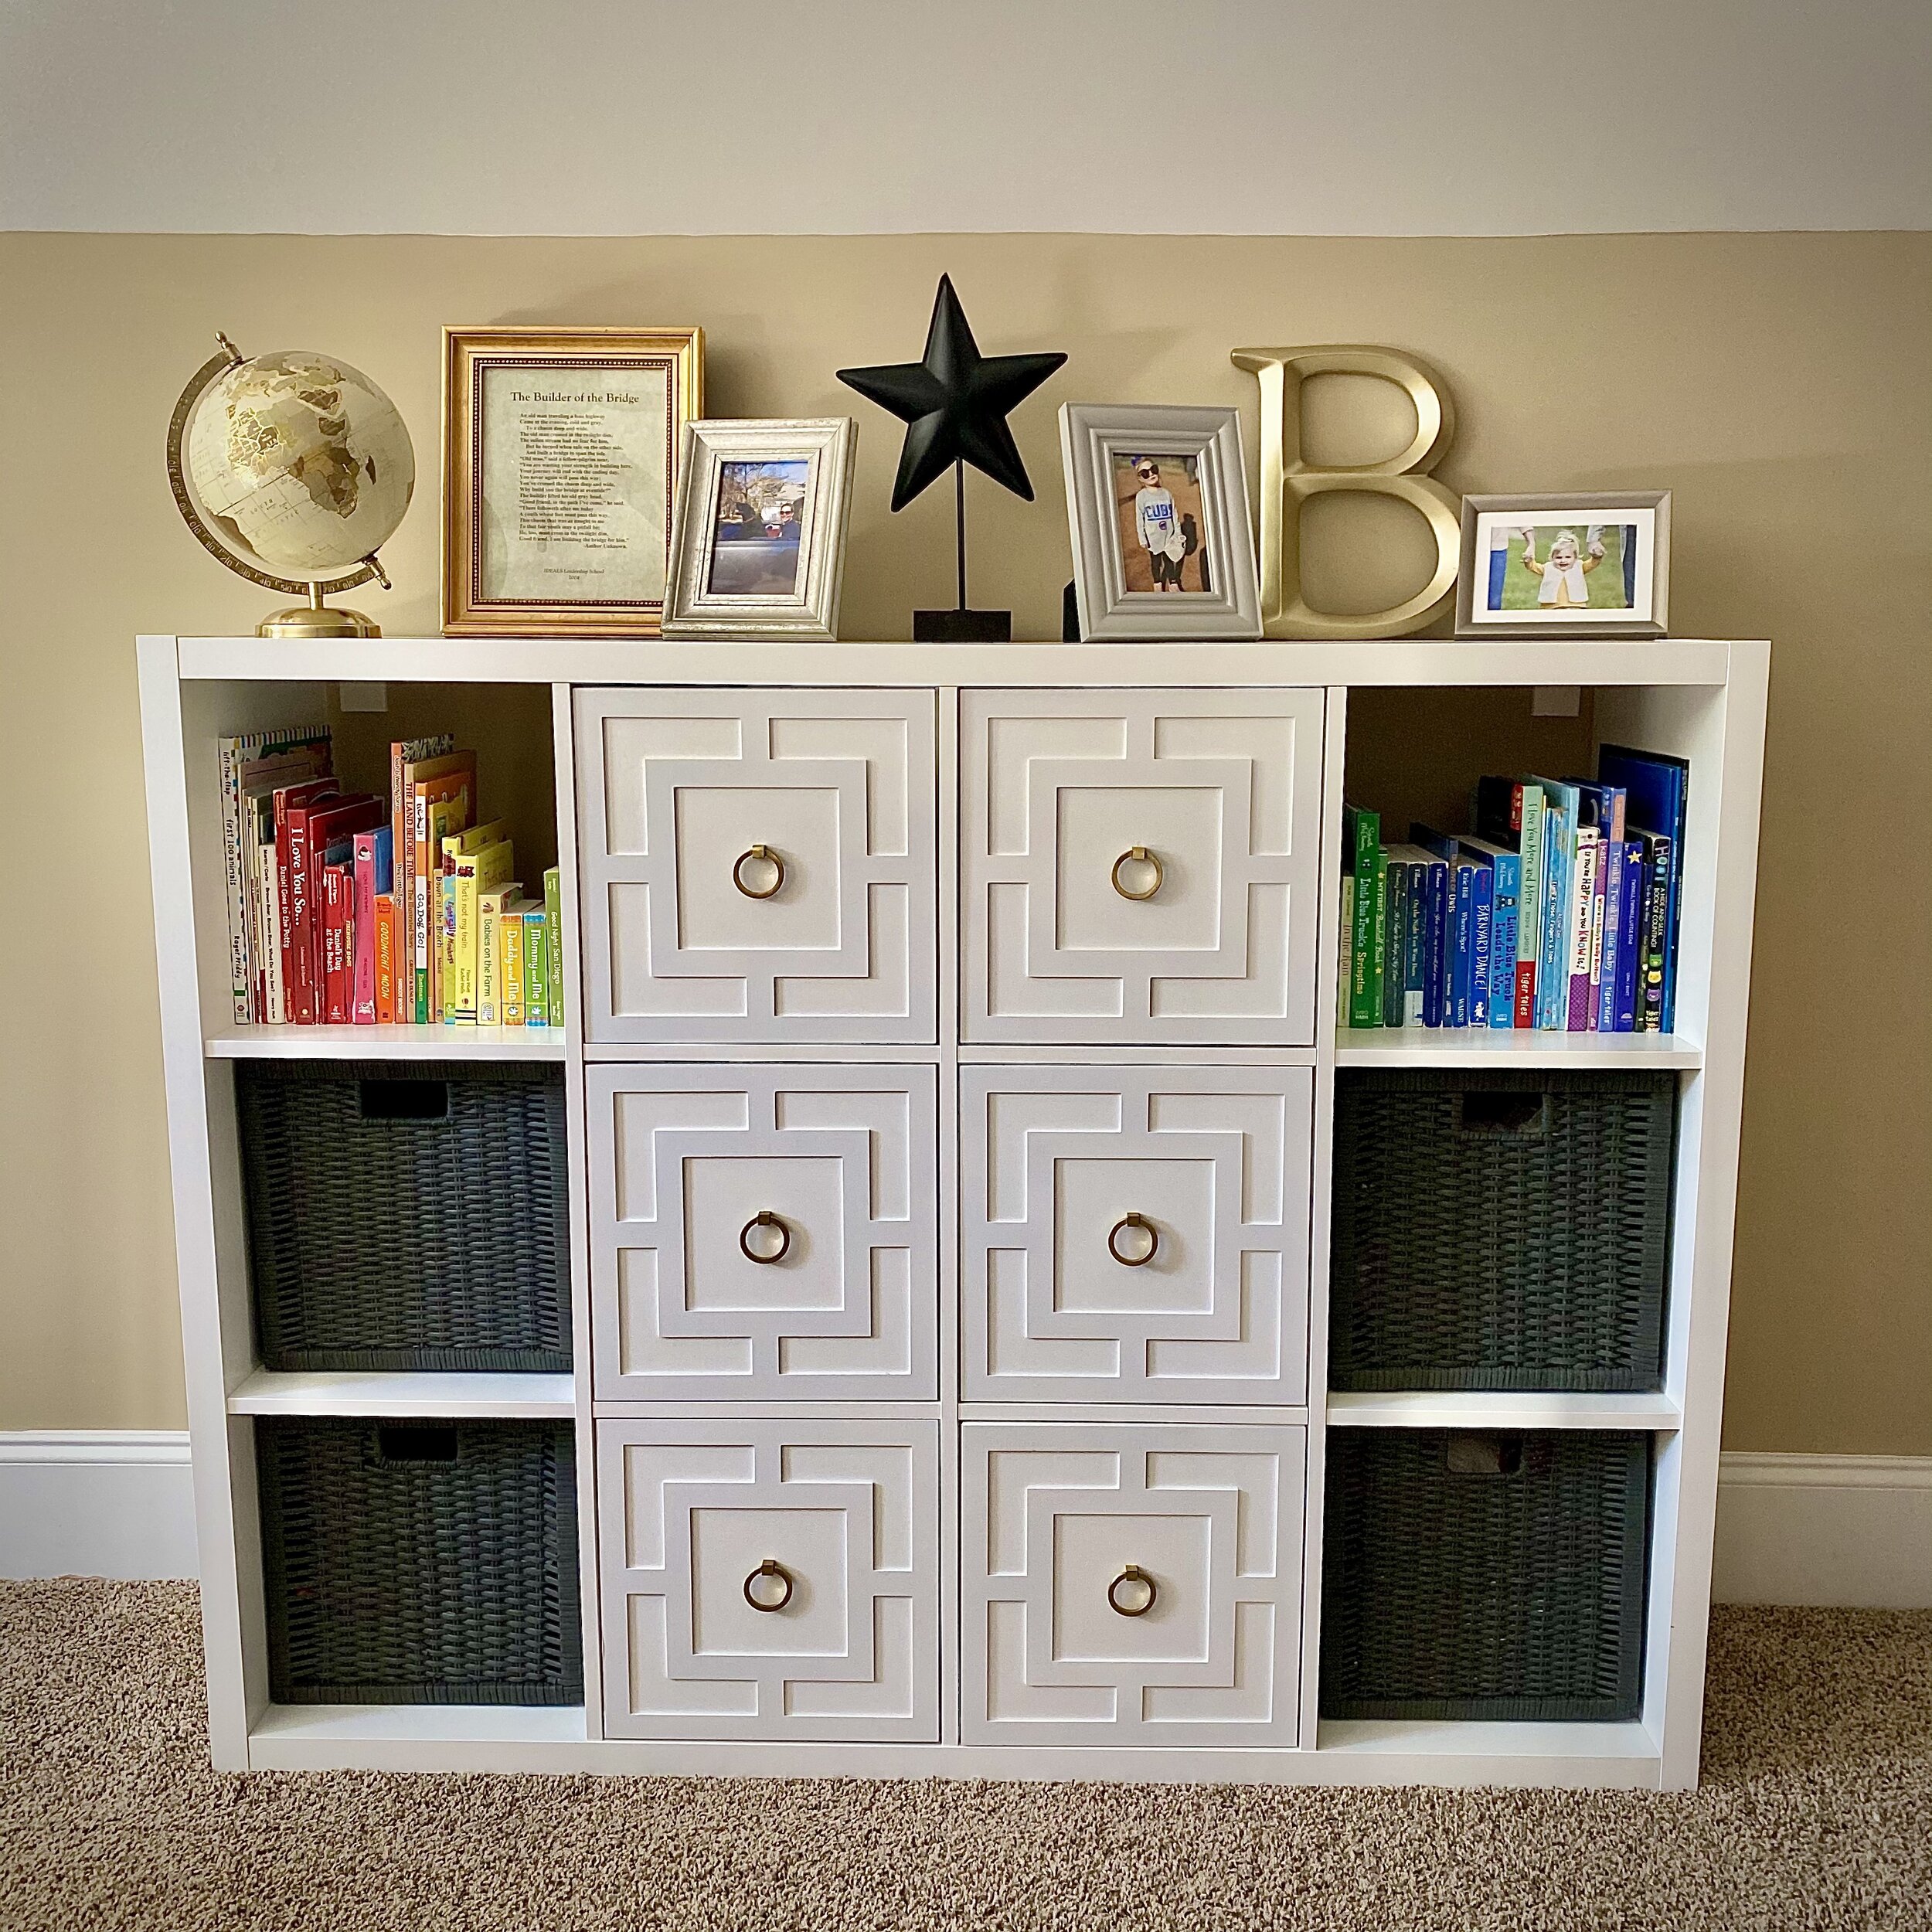

One of the hardest parts about playrooms is the sheer volume of items (big and small) and all of the different categories of toys. This IKEA KALLAX unit makes it easy to come up with a system to divide and conquer all of the toys, which I love. Whether you use this unit, something similar, a bookshelf, or closet, I highly suggest pairing something like this with smaller organization bins or boxes to divide everything in a playroom. And that does not necessarily mean purchasing all new items… for now, I have repurposed bins inside the KALLAX unit that I was not using to organize the smaller items.
I’ve said it a million times, but… organization takes time and it’s perfectly OK to live with a room or system before settling on something. No sense spending money on something that is wasted, does not make your life easier, and/or does not help you stay organized. For me, the organization of this toy storage is ever-evolving as I see what works and what does not and as my daughter’s interests and toys change. For example, I have already rearranged some of the cubes to put the baskets on the bottom two rows (and books on top) because my daughter is only three years old and she could not pull the baskets out of the top cubes on her own.
Here are the materials I used (with links):
IKEA KALLAX unit (I chose 3x4 cubes for my space, but they have several larger and smaller options), $89.99 (linked here)
IKEA KALLAX insert with doors (I chose 6 for the two columns down the middle of the unit), $17 each (linked here)
O’verlays Harper kit for KALLAX door, $18.95 each (linked here)
Rustoleum spray paint, flat white, $4.38 (linked here)
Liquid nails, $8.24 on Amazon (I believe it is less expensive at Home Depot or your local hardware store) (linked here)
Brass pulls for the doors, $16.99 for pack of 4 (linked here)
IKEA BRANÄS baskets, $12.99 (linked here)
Here is the process I used:
I assembled the KALLAX shelf unit according to the instructions, including securing the unit to the wall.
I assembled and inserted the KALLAX inserts according to the instructions, but I did not attach the doors yet. I chose to have closed storage down the middle two columns and open storage down the two outside columns.
I painted the O’verlays white to match the shelf unit.
I glued the O’verlays to the doors using Liquid Nails. O’verlays come with straightforward instructions and they are also on the website (find them here).
I precisely measured (measure twice, drill once) and drilled holes for the door hardware, and then attached the door handles/knobs to the doors. Side note- to match the rest of the furniture in this room, I bought the same rectangular hardware only smaller (linked here) to achieve a cohesive look with the other furniture and because I really like them… but they looked awkward with the O’verlays pattern I chose so I changed my mind and used the circular pulls- love them!
I attached the doors to the shelf unit. (See my lessons learned below because this step was A LOT harder than I anticipated).
Here are the lessons I learned:
The KALLAX unit is a lot sturdier than I expected. I read a few reviews that said otherwise, but I was pleasantly surprised. Again, ALWAYS secure furniture to the wall.
The KALLAX doors on the inserts are impossible to get straight. I tried everything to line each of the doors up perfectly and could not do it. It is close enough, but, as someone who loves symmetry, it bothered me that I could not get all of the doors to have the same gaps above, below, and in the middle.
The O’verlays on the KALLAX unit are super easy to put on and line up.
The KALLAX cube size is pretty standard so you can find baskets and boxes elsewhere to fit the cubes. I have the gray baskets (for now) because the white baskets I wanted were sold out. But I have seen cute baskets and bins that would fit the cubes in many different stores so I might switch them later.
I am still working on where to put everything in this unit. I’m not 100% sold on the placement of the books and baskets in the open storage, but I am going to live with it like this for now and make changes later if I want.
Note: Please always remember to anchor furnishings to the wall to avoid injury from furniture tipping over.